![]()
IP PBX FAQ
VPN Trunk

|
IP PBX FAQVPN Trunk |
|
|
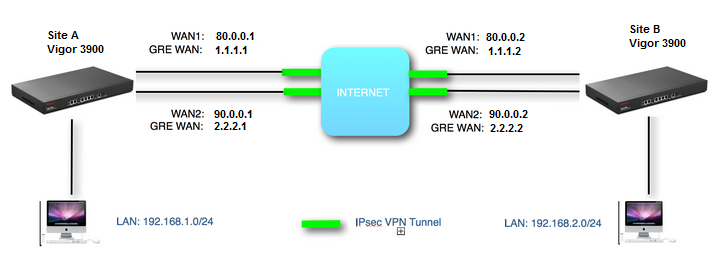
VPN Trunks offer a way of creating multiple site-to-site VPN tunnels between the same two subnet, the advantage of doing this is that the VPN trunk can provde both load balancing and redundancy. If there are mutiple WAN connections available then one VPN tunnel could be created on each WAN to maximise the bandwidth available for the VPN trunk. Even if one of the sites has a signle WAN link, a one-to-many VPN trunk can be created to take advantage of the multiple connections at the multi-wan site. The Vigor 3900 offers Load Balance and Failover modes.
VPN Trunk - Load BalanceConsider a scenario as per Figure (1), Here Vigor 3900s on Site A and Site B have two WAN connections and there are two IPSec VPN links through each WAN port.
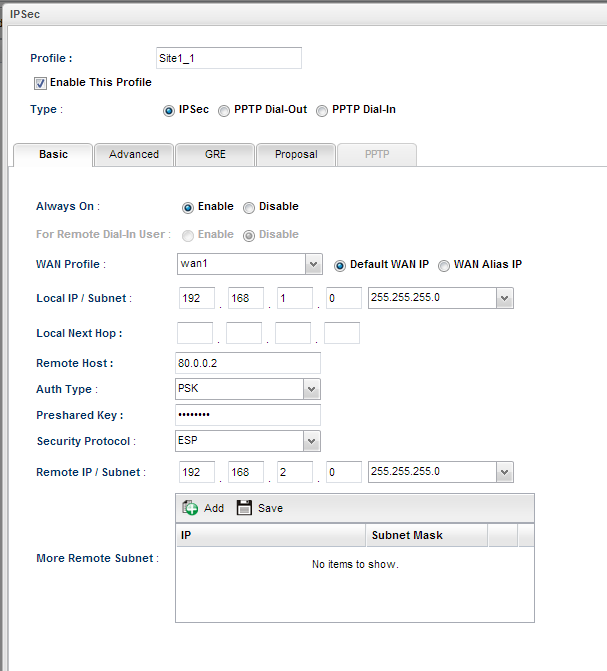
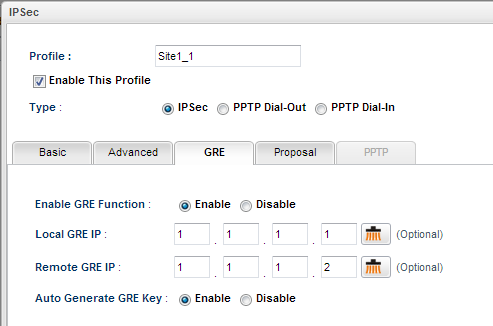
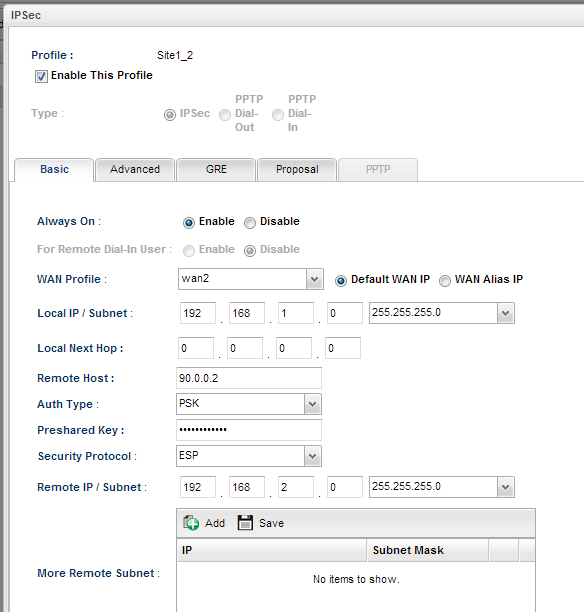
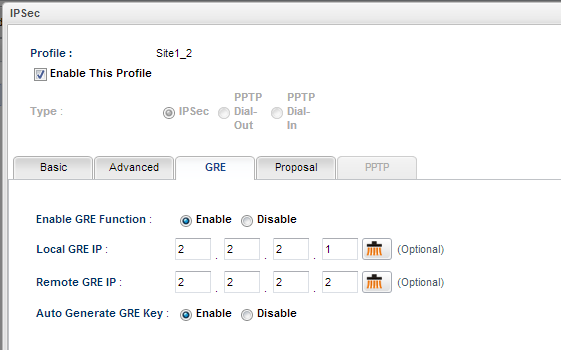
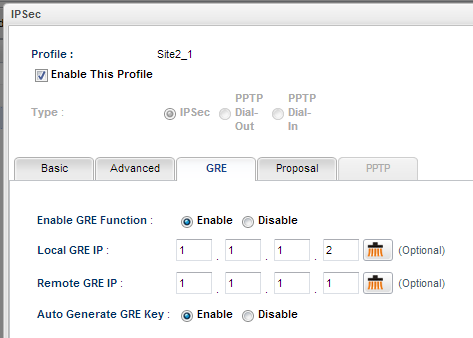
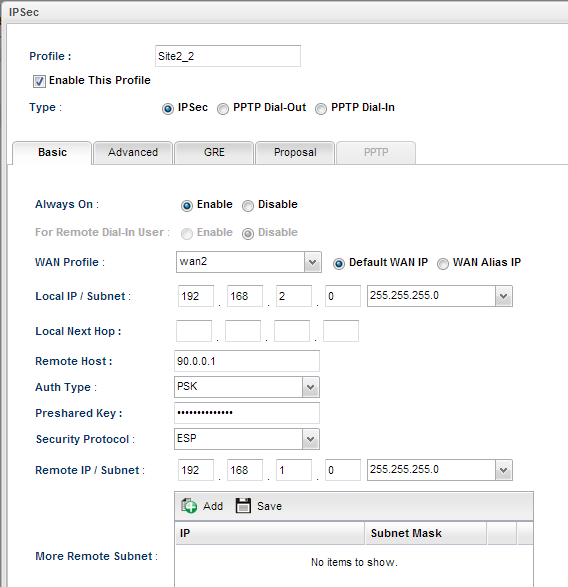
Part 1: Site A Vigor 3900 ConfigurationGo to [VPN and Remote Access] - > [VPN Profiles] menu. Here add two VPN profiles for WAN1 and WAN2 each. VPN Profile 1 (WAN1)
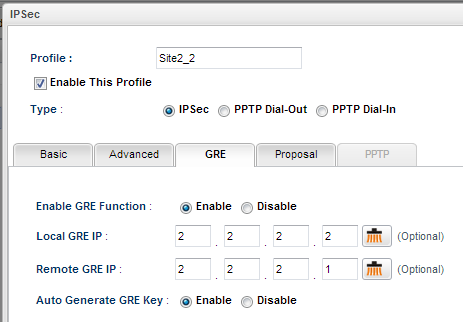
[GRE IP Addresses can be any IP address of your choice. Just make sure that they do not conflict with any IP subnet routes in the Routing Table.] VPN Profile 2 (WAN2)
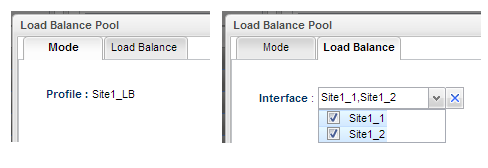
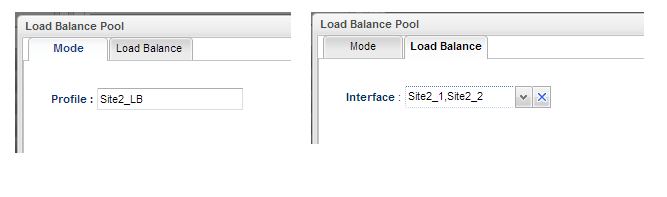
Go to [VPN and Remote Access] -> [VPN Trunk Management] menu. Here click on Load Balance tab. Here add a Load Balance Pool and select appropriate VPN profiles.
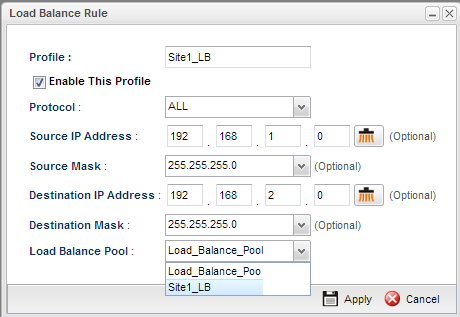
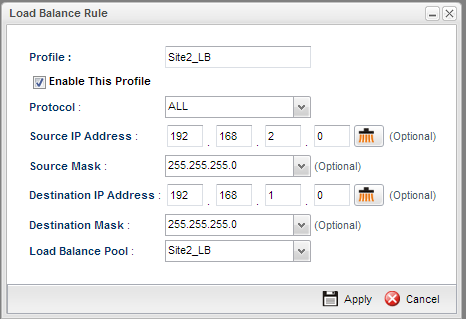
Under Load Balance Rule tab, add a rule as shown in below screenshot.
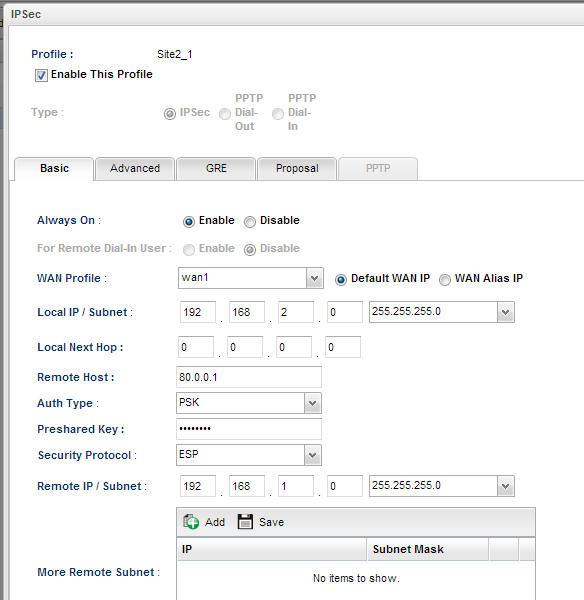
Part 2 : Site B Vigor 3900 ConfigurationVPN Profile 1 (WAN1)
VPN Profile 2 (WAN2)
VPN Trunk Management
|
NOTICE : This document is © SEG Communications and may not be distributed without specific written consent. Information and products subject to change at any time without notice.
Page last modified 21 Aug 2013