

- Router,DrayOS 4
Setting up Hotspot Web Portal with Facebook / Google Authentication
VI. Feature Setup
Setting up Hotspot Web Portal with Facebook & Google Authentication

DrayTek's Hotspot Web Portal feature provides a way to control access to the Internet, through the router's built-in wireless networks, or VLANs if using separate VigorAP Access Points.
Hotspot Web Portal displays the portal page to end users accessing the Internet through the router. Depending on configuration, it can allow access immediately, or require identity verification to proceed to the Internet.
It supports full customisation of the interface displayed to users, so that users connecting to the Hotspot network can be shown branding and details of the company providing the network, with terms and conditions or an acceptable use policy.
The Hotspot Web Portal feature in firmware version 3.8.4.3 and later, provides authentication of users through the use of these methods:
| Click Through | Display branding for the network with a welcome message and terms and conditions |
| Social Media Login | Users can authenticate with Google or Facebook |
| SIM PIN Code | Users can authenticate with a unique PIN code by sending a text message to their phone |
This setup guide will demonstrate how to configure the Hotspot Web Portal to allow authentication through the user's social network accounts.
Users will be prompted with the Hotspot welcome page when accessing HTTP websites. This works through modification of DNS requests; when accessing a website before authentication has occurred, the router will modify the DNS response to point to the router's "portal.draytek.com" hostname, which then requests authentication.
The router's Hotspot Web Portal functionality can be configured to perform this DNS modification for HTTPS sites; the issues this can cause are explained in the HTTPS Redirection section of the Hotspot Web Portal tab.
The Social Media login method does not support Captive Portal, which would guide users to the Hotspot Web Portal's welcome page.
Facebook and Google are currently supported for authentication; the Hotspot Web Portal interface can be configured to allow Facebook only, Google only, or both.
Prerequisites
- Google Account to configure a Google App for use with Hotspot Web Portal with an App ID
and / or - Facebook Developer Account to configure a Facebook App for use with Hotspot Web Portal with an App ID
- Internet access for the router
The Hotspot Web Portal requires an interface to Facebook or Google to allow for authentication of users's through the social media network's systems. This App will be unique to your company and can be customised to display the name of the Hotspot or company.
The setup of a Google or Facebook account to create this App with the App ID that must be entered during the Hotspot Web Portal profile configuration to use that method of authentication.
Configure Google API for use with Hotspot Web Portal
To create an App ID that the router will need to interface with Google for authentication, go to https://console.developers.google.com
1. Login with a Google account then click [Project] > [Create project].

2. Enter the name of the project as "draytek hotspot", select Yes to agree to the Terms of Service of Google, then click Create.
The Project ID will automatically create a unique name which does not affect usage of the Google App.

3. The Google API will then present this message, click Configure consent screen to continue:

4. On the [Credentials] > [OAuth consent screen], enter the Product name shown to users as the name that you wish to display to end users authenticating with the network, which will be shown to users during the authentication process (example below), then click Save.


When a user connects to the Hotspot Web Portal and goes through the Google authentication process, they will be shown this message - the name shown preceeding "would like to:" is set from the OAuth consent screen settings and can be changed at any time after creating the Google App through the Google API console.
5. With the Consent screen configured, go to the [Credentials] > [Credentials] tab, click Create credentials and select OAuth client ID.

6. Select Web application as the Application Type and enter the Name of WebPortal_Google exactly as shown (case sensitive).
Set the Authorized JavaScript origins as http://portal.draytek.com:8001 and https://portal.draytek.com:8043. This allows the App to operate with the router's portal in both HTTP and HTTPS modes.
Click the Create button to create the client ID for the App. If this does not create the client ID immediately, click Create a second time.

7. This will then pop-up the Client ID and Client Secret, these information will be used in the router's Hotspot Web Portal Setup page as the APP ID and APP Secret. When copying these details, remove any leading and trailing space " " characters. These details can be retrieved at any time from the Google API Console in the [Credentials] > [Credentials] section by selecting the created OAuth Client ID from the list.

8. Go back to the Dashboard in the Google API Manager and click Enable API:

9. That will lead to the Library section, select the Google+ API:

10. In the Google+ API screen, click Enable to allow this API to be used by the router's Hotspot Web Portal web application.

Configure Facebook API for use with Hotspot Web Portal
To create a Facebook App for use with Hotspot Web Portal, it will be necessary to have a Facebook Developer account and create an app within the Facebook platform, which the router will interface with.
1. Register as a Facebook Developer: Go to https://developers.facebook.com/ and click Get Started to login with your Facebook account.

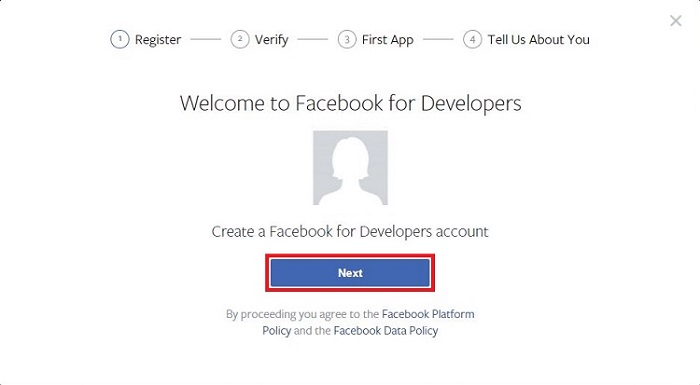
2. Click Next on the welcome page:

3. Enter your phone number for Facebook's verification process and click Send as Text, or Send via Phone Call to get the confirmation code. Enter the code and click Verify.

4. For the First App, enter the APP NAME and CONTACT EMAIL, then click Next.

5. Complete the security check and click Submit to proceed.

6. Select a category to tell Facebook what you do, or click Skip this step:

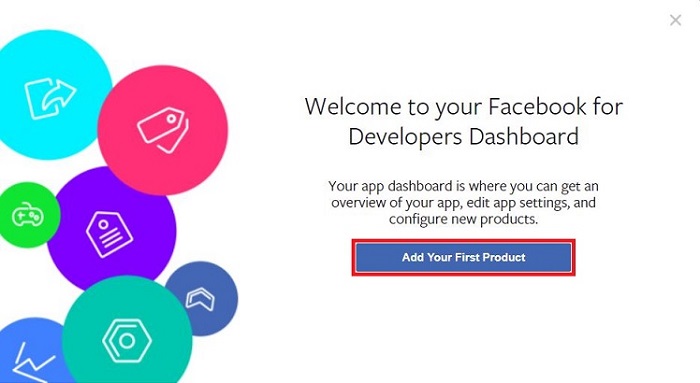
7. Click Add Your First Product to finish the Get Started process.

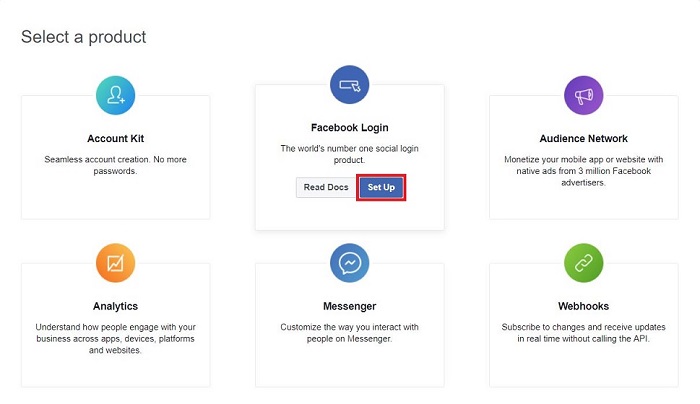
8. You will be lead to the Add Product page automatically, then choose the Facebook Login by clicking Set Up.

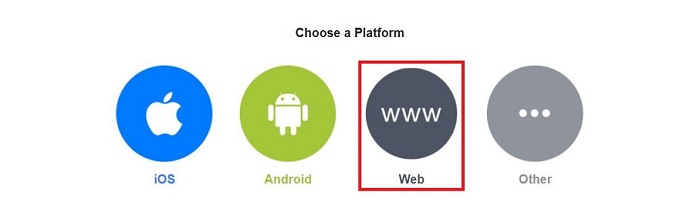
9. Click the Web icon on the Choose a Platform page.

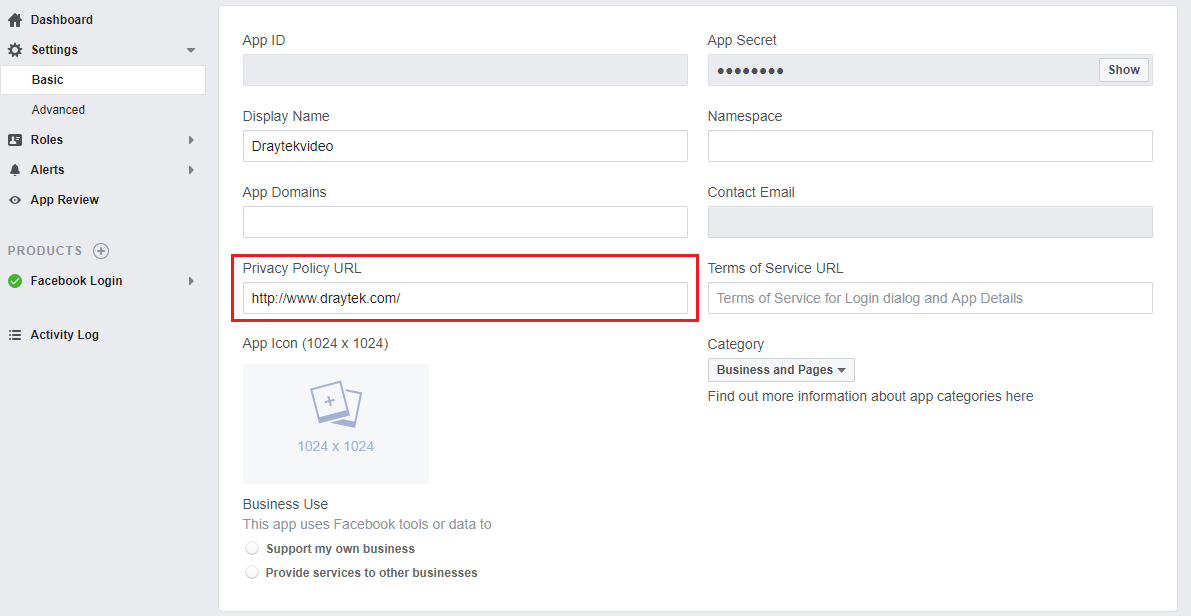
10. In [Settings] > [Basic], enter your company's Privacy Policy URL and click Save Changes.

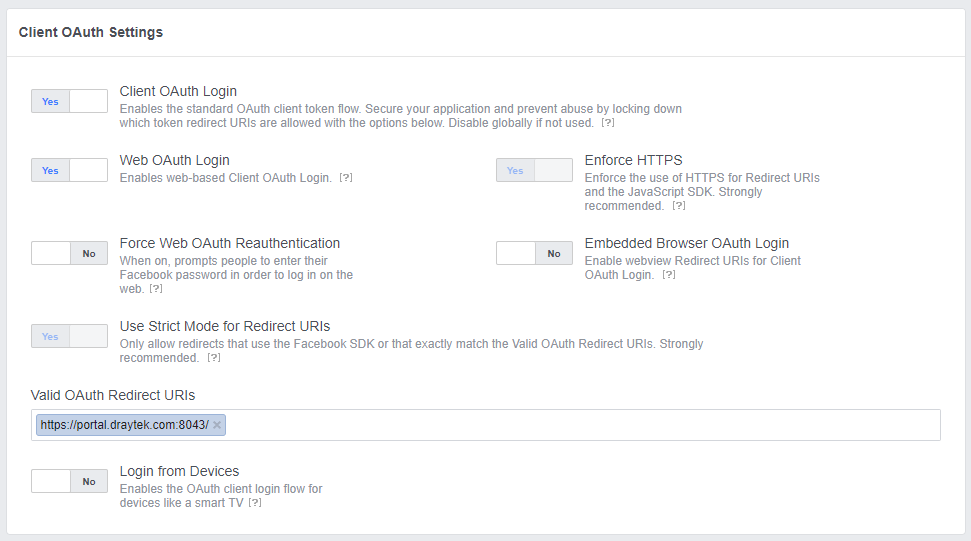
11. Enter https://portal.draytek.com:8043 in Valid OAuth redirect URIs at Client OAuth Settings, then click Save Changes.

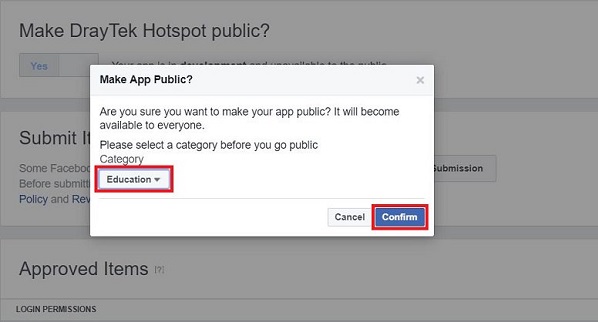
12. Go to the App Review page and switch Make DrayTek Hotspot public? to Yes, to activate the app for use.

13. Select the correct Category for your usage of the application and click Confirm on the pop up window.

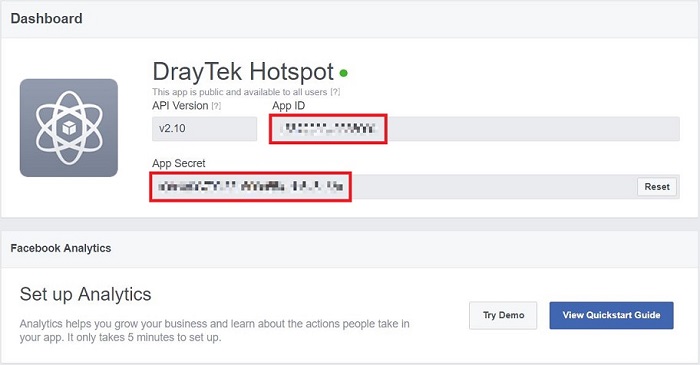
14. Go to Dashboard, the App is active now and you can get your App ID and App Secret on this page. Click Show button to reveal the App Secret.

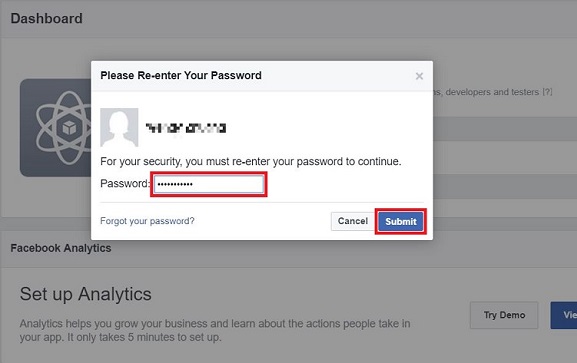
15. Enter the password of your Facebook account and click Submit on the pop up window, then you can get your App Secret.

16. The App ID and App Secret will be used in Vigor Router's Web Portal Setup page.

Setting up Hotspot Web Portal
Check that the router has Internet access before continuing, using Google or Facebook as authentication methods requires working Internet access for authentication to take place.
Before continuing, decide whether to use Google, Facebook or both for authentication and follow the instructions in the Google / Facebook tabs to create the necessary App for the router to use for authentication.
1. Go to [Hotspot Web Portal] > [Profile Setup] and click on an available index number:

2. Enable this profile and set the name for the profile in the Comments field.
Select "Social Login" which will make the options to select which social login method will be used, appear at the bottom of the page:

Select Login with Facebook or Login with Google depending on which App type has been configured and click Save and Next to continue.
3. Choose a login page design, customize the color and images as required then click Save and Next.

4. Customize the descriptions on the login page as required.
Enter the Social Media App ID and App Secret values from Google and/or Facebook, then click Next.

5. The last page of the Hotspot Web Portal profile has options to select how users are guided to the Portal page, what happens once they have authenticated and which network segments / Wireless Networks this profile applies to.
In this example, HTTPS Redirection is not enabled; this means that access to HTTPS sites before authentication is blocked by the router's firewall. Users must access an HTTP site to see the Hotspot Web Portal authentication page.
If HTTPS Redirection is enabled, the router will redirect access for HTTPS sites to the router's Hotspot Web Portal. Please read the HTTPS Redirection section below for more information.
Set up the landing page that users will see after they log in successfully. In this example, users will see www.draytek.com once they have authenticated successfully.
Select the interfaces to apply the Hotspot Web Portal to, then click Finish to save the profile.

HTTPS Redirection
The option to enable or disable "HTTPS Redirection" defines how the Hotspot Web Portal handles HTTPS connections for users that have not yet authenticated.
If this option is disabled, HTTPS traffic is blocked by the router until the user has authenticated and the user must access an HTTP webpage to be redirected to the router's Hotspot Web Portal welcome page.
Enabling HTTPS Redirection will modify DNS requests for access to HTTPS sites so that access to any HTTPS page will result in the Hotspot Web Portal welcome page on "portal.draytek.com" loading instead. HTTPS is designed around SSL Certificates, which validate whether an HTTPS site is legitimate or not through matching data in an SSL Certificate to the hostname / website being accessed. If these details do not match, a web browser will typically display a warning like the ones shown below:
 |
 |
This is caused by the HTTPS Redirection feature and is inherent to any Web Portal system that redirects HTTPS traffic. Note that in the image on the right, access to the site is blocked entirely because of HSTS - HTTPS Strict Transport Security.
Because of the confusion this can cause to end users of a Hotspot Web Portal wireless network, it may be beneficial to leave HTTPS Redirection disabled and recommend that users access a specified HTTP website to authenticate with the Hotspot network.
6. The Hotspot Web Portal configuration will be applied to users connecting to the interfaces selected. Click Preview to view the login page through the web browser:

When a user connects to a wireless network or network that has Hotspot Web Portal applied to it, access to HTTP sites will be redirected to the router's Hotspot Web Portal authentication page. The portal page will display Facebook or Google as an option, or both, depending on which methods were selected when configuring the Hotspot Web Portal profile.
The Social Media login method is not compatible with Captive Portal, which can guide users to the Hotspot Portal page when connecting to the wireless network automatically. If this is required, use SIM PIN code authentication instead.
Users can view the Terms and Conditions for the Hotspot network and click Login with Facebook or Login with Google to continue.

Once the user has selected Google or Facebook, Google or Facebook will present a confirmation screen to the user to confirm whether the Hotspot Web Portal's App can access the displayed items of information.
Users must click Allow to proceed.

After a successful authentication, the user will be directed to the specified landing page, the original page they were accessing, or an HTML bulletin message depending on the action that was selected when configuring the Hotspot Web Portal profile.
After authenticating through a social media account, users can reconnect to the network immediately by selecting the method they have authenticated with previously. This is because the Hotspot Web Portal's App is linked to their account for authentication on request and so, does not need to request permission a second time.
Users can view which Apps are linked to their Google or Facebook account with the name that was specified during the setup process and remove this access if required.

How do you rate this article?
Add a comment to this article
NOTE : All comments are reviewed before publication and may not be posted or may be redacted if the editors do not consider them helpful. The use of offensive or obscene language, copyrighted material, or advertising or promotion or linking to any other product or service is prohibited. By submitting your comment, you confirm that you are the original author and assign copyright of the content to DrayTek indefinitely and irrevocably.